Instead of dropping 50+ dollars on a camp stove, Lucas and I decided to make our own from two aluminum cans. We will use denatured alcohol for fuel during our Appalachian Trail thru-hike. Alcohol burning stoves are cheap, ultralight weight, and just as reliable as a store-bought stove. Our stove will be used primarily for boiling water to rehydrate dehydrated food. From our tests, we have concluded that it takes less than five minutes to boil 500 mL of lukewarm water.
Here’s a step-by-step guide on how to create your own!
Materials you will need:
- two aluminum cans
- books for a steady line
- permanent marker
- small nail, thumb tack, or push pin
- sandpaper
- razor blades
- scissors
- stapler
- pliers

Step 1:
Use a book (or something sturdy) for a constant height to score the can with a razor blade. Once you have scored the bottom, you puncture the can along the score line and then press along the edge of the line until the bottom separates. If the can does not tear apart easily, use the sharp edge of the razor to CAREFULLY cut along the score line. This will dull the blade greatly, so make sure you have backup razors if you choose this method (I used one blade for each can).
Do this with both cans, use whatever height you feel necessary, but keep in mind that the final stove will be a little taller than your cut lines.


Step 2:
When the cuts are done, sand the sharp edges for safety (newly cut aluminum is VERY sharp). If you want your stove to have none of the can’s labels, sand the sides of the two cans.
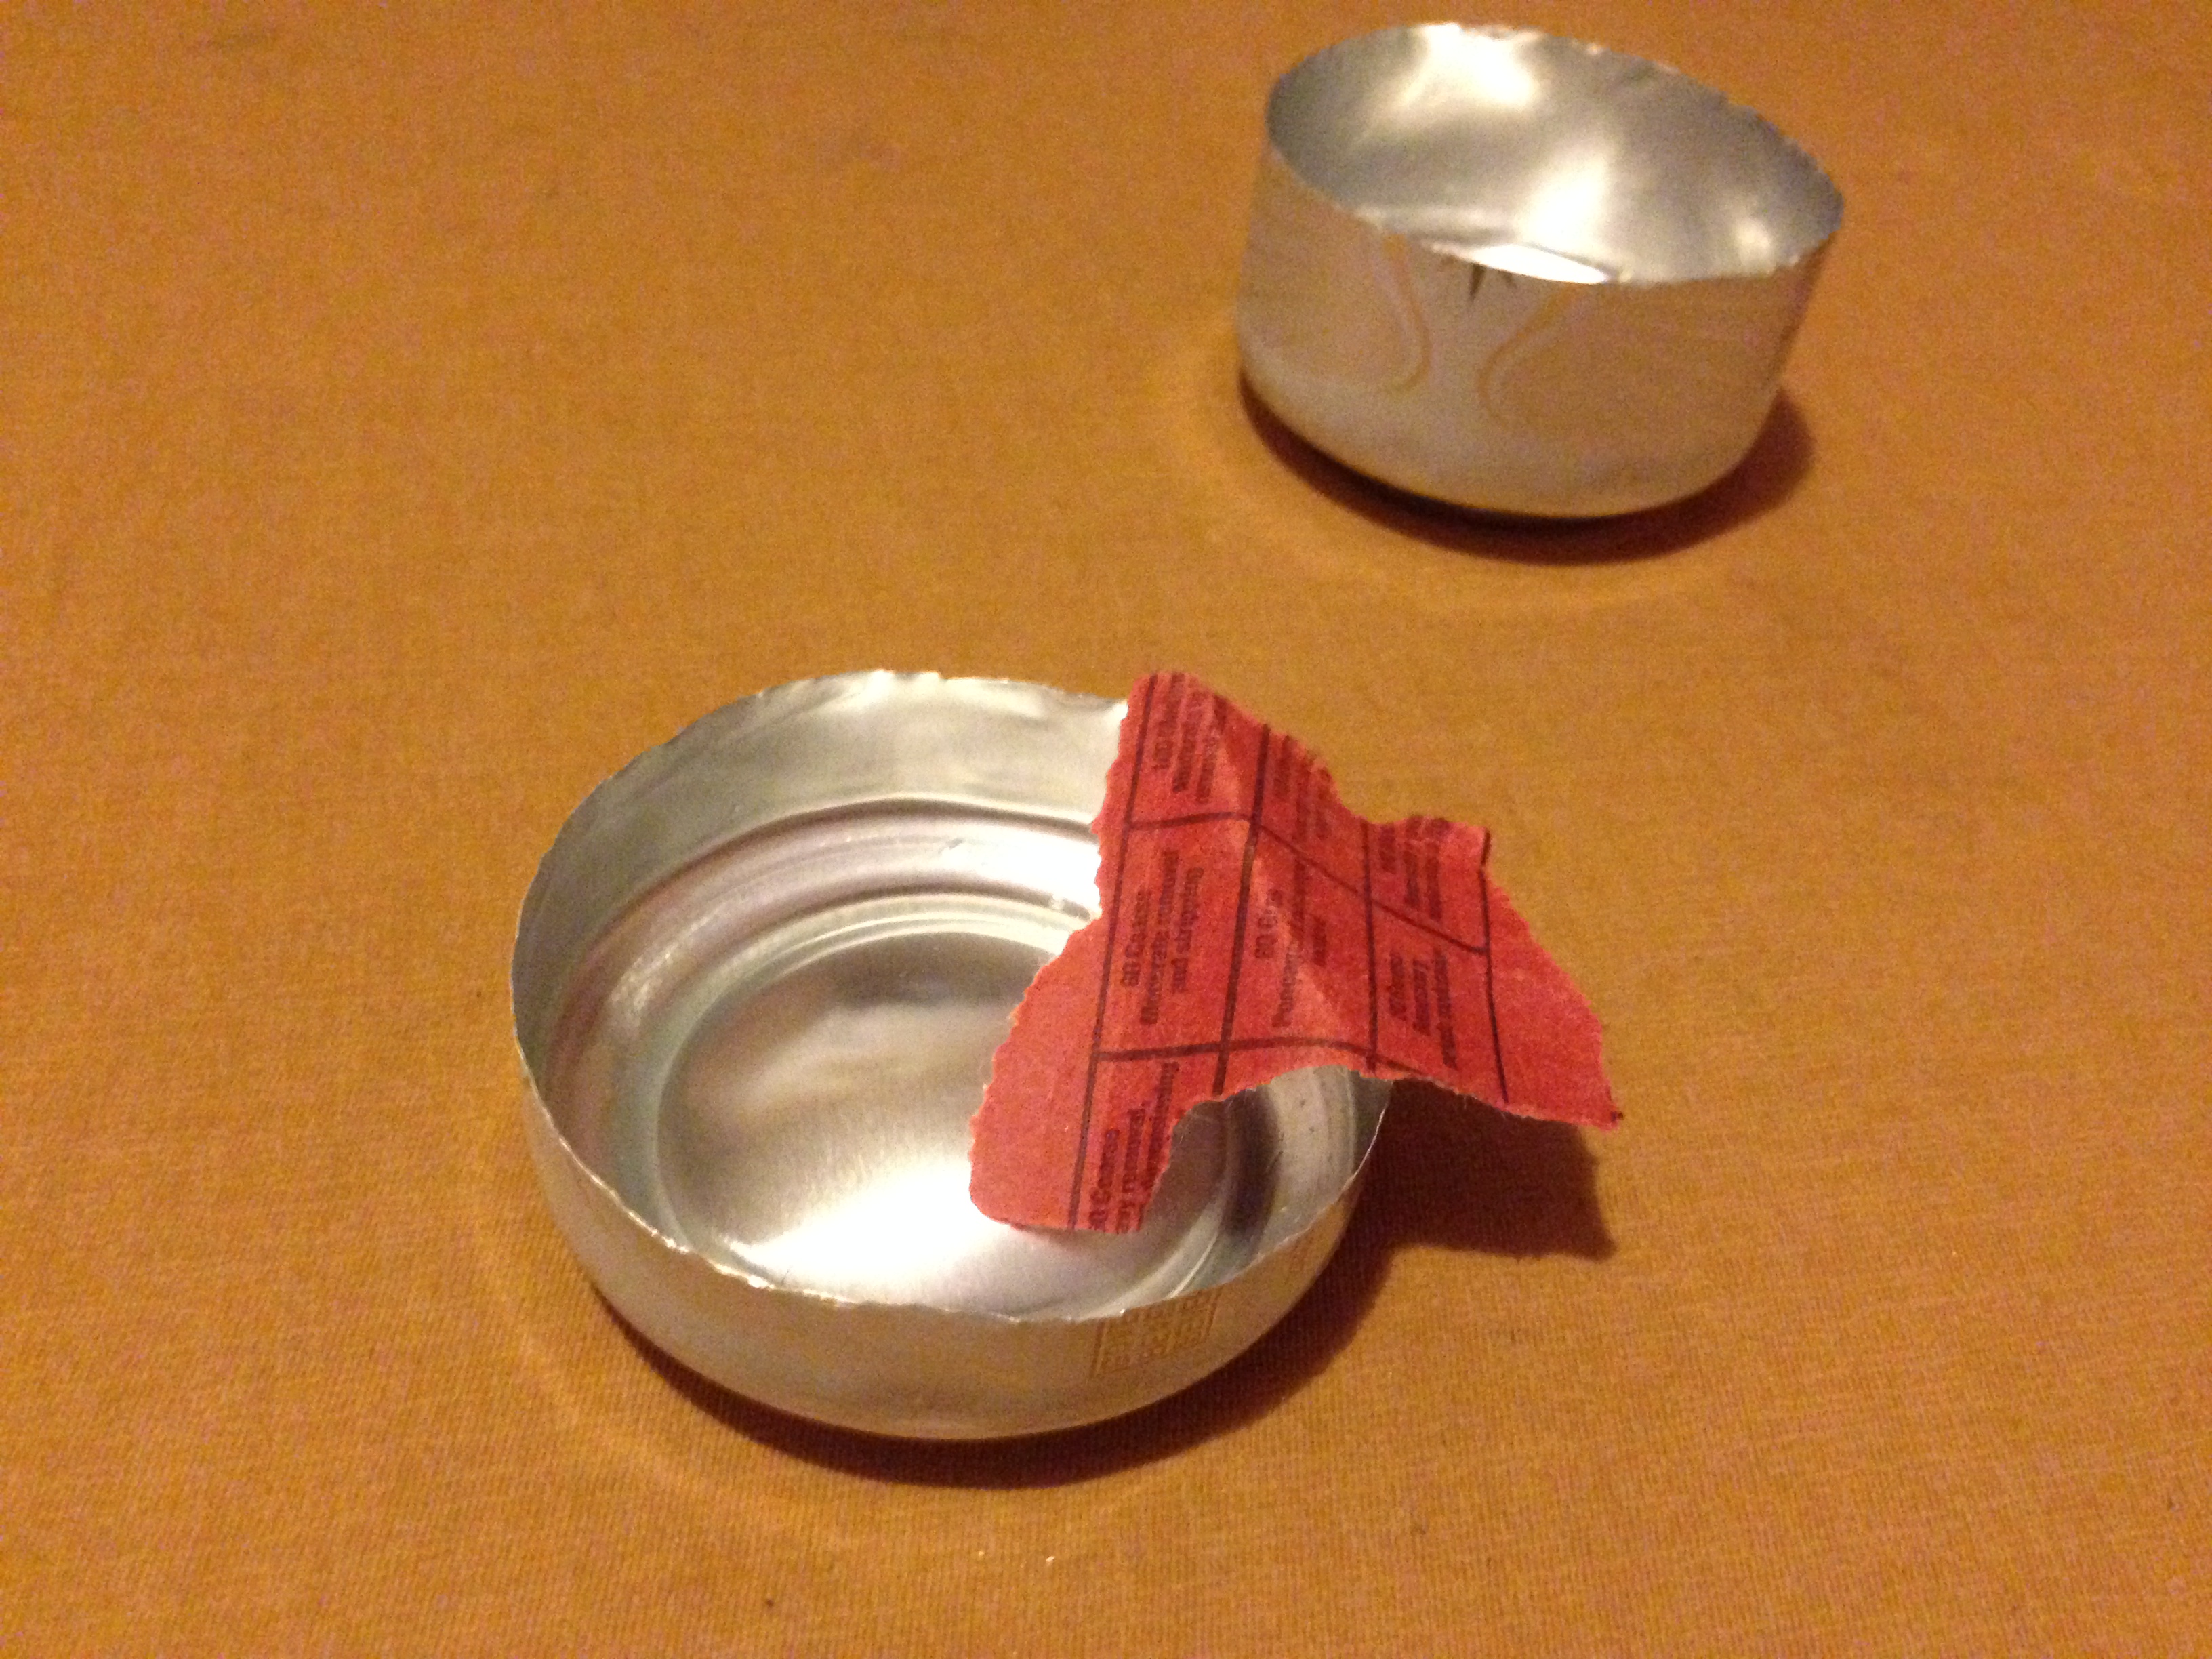
Step 3:
Choose one can to be the top of the stove, and set the bottom portion aside. Score the top portion of the stove along the concave part of the can. This sounds difficult, but if you score at an almost horizontal angle, it makes the cut a lot easier than you would expect. Now use the point of the scissors to press the score line until the top pops out.

Step 4:
Take the remnants of one of the cut cans, and cut a wide strip of the aluminum off. This will be the inner lining of the stove.

Step 5:
Measure and trim the strip of aluminum so it will fit into the grooves of both the top and bottom portion of the stove, and staple the strip into a ring. After the ring is measured and stapled, cut small “windows” on the bottom of the ring so the fuel will be able to move throughout the stove once it is completed.

Step 6:
Take your pliers and make slight twists on the edge of one portion of the stove so that it will fit into the other portion.

Step 7:
Here comes the hard part–try to fit the ring made earlier into the grooves on both portions of the stove while slowly pushing one section into the other. You may need to use your pliers to bend little bits out of the way so the ring will fit right. If done correctly, the lip of the top portion of the stove will cover the edge of the ring.
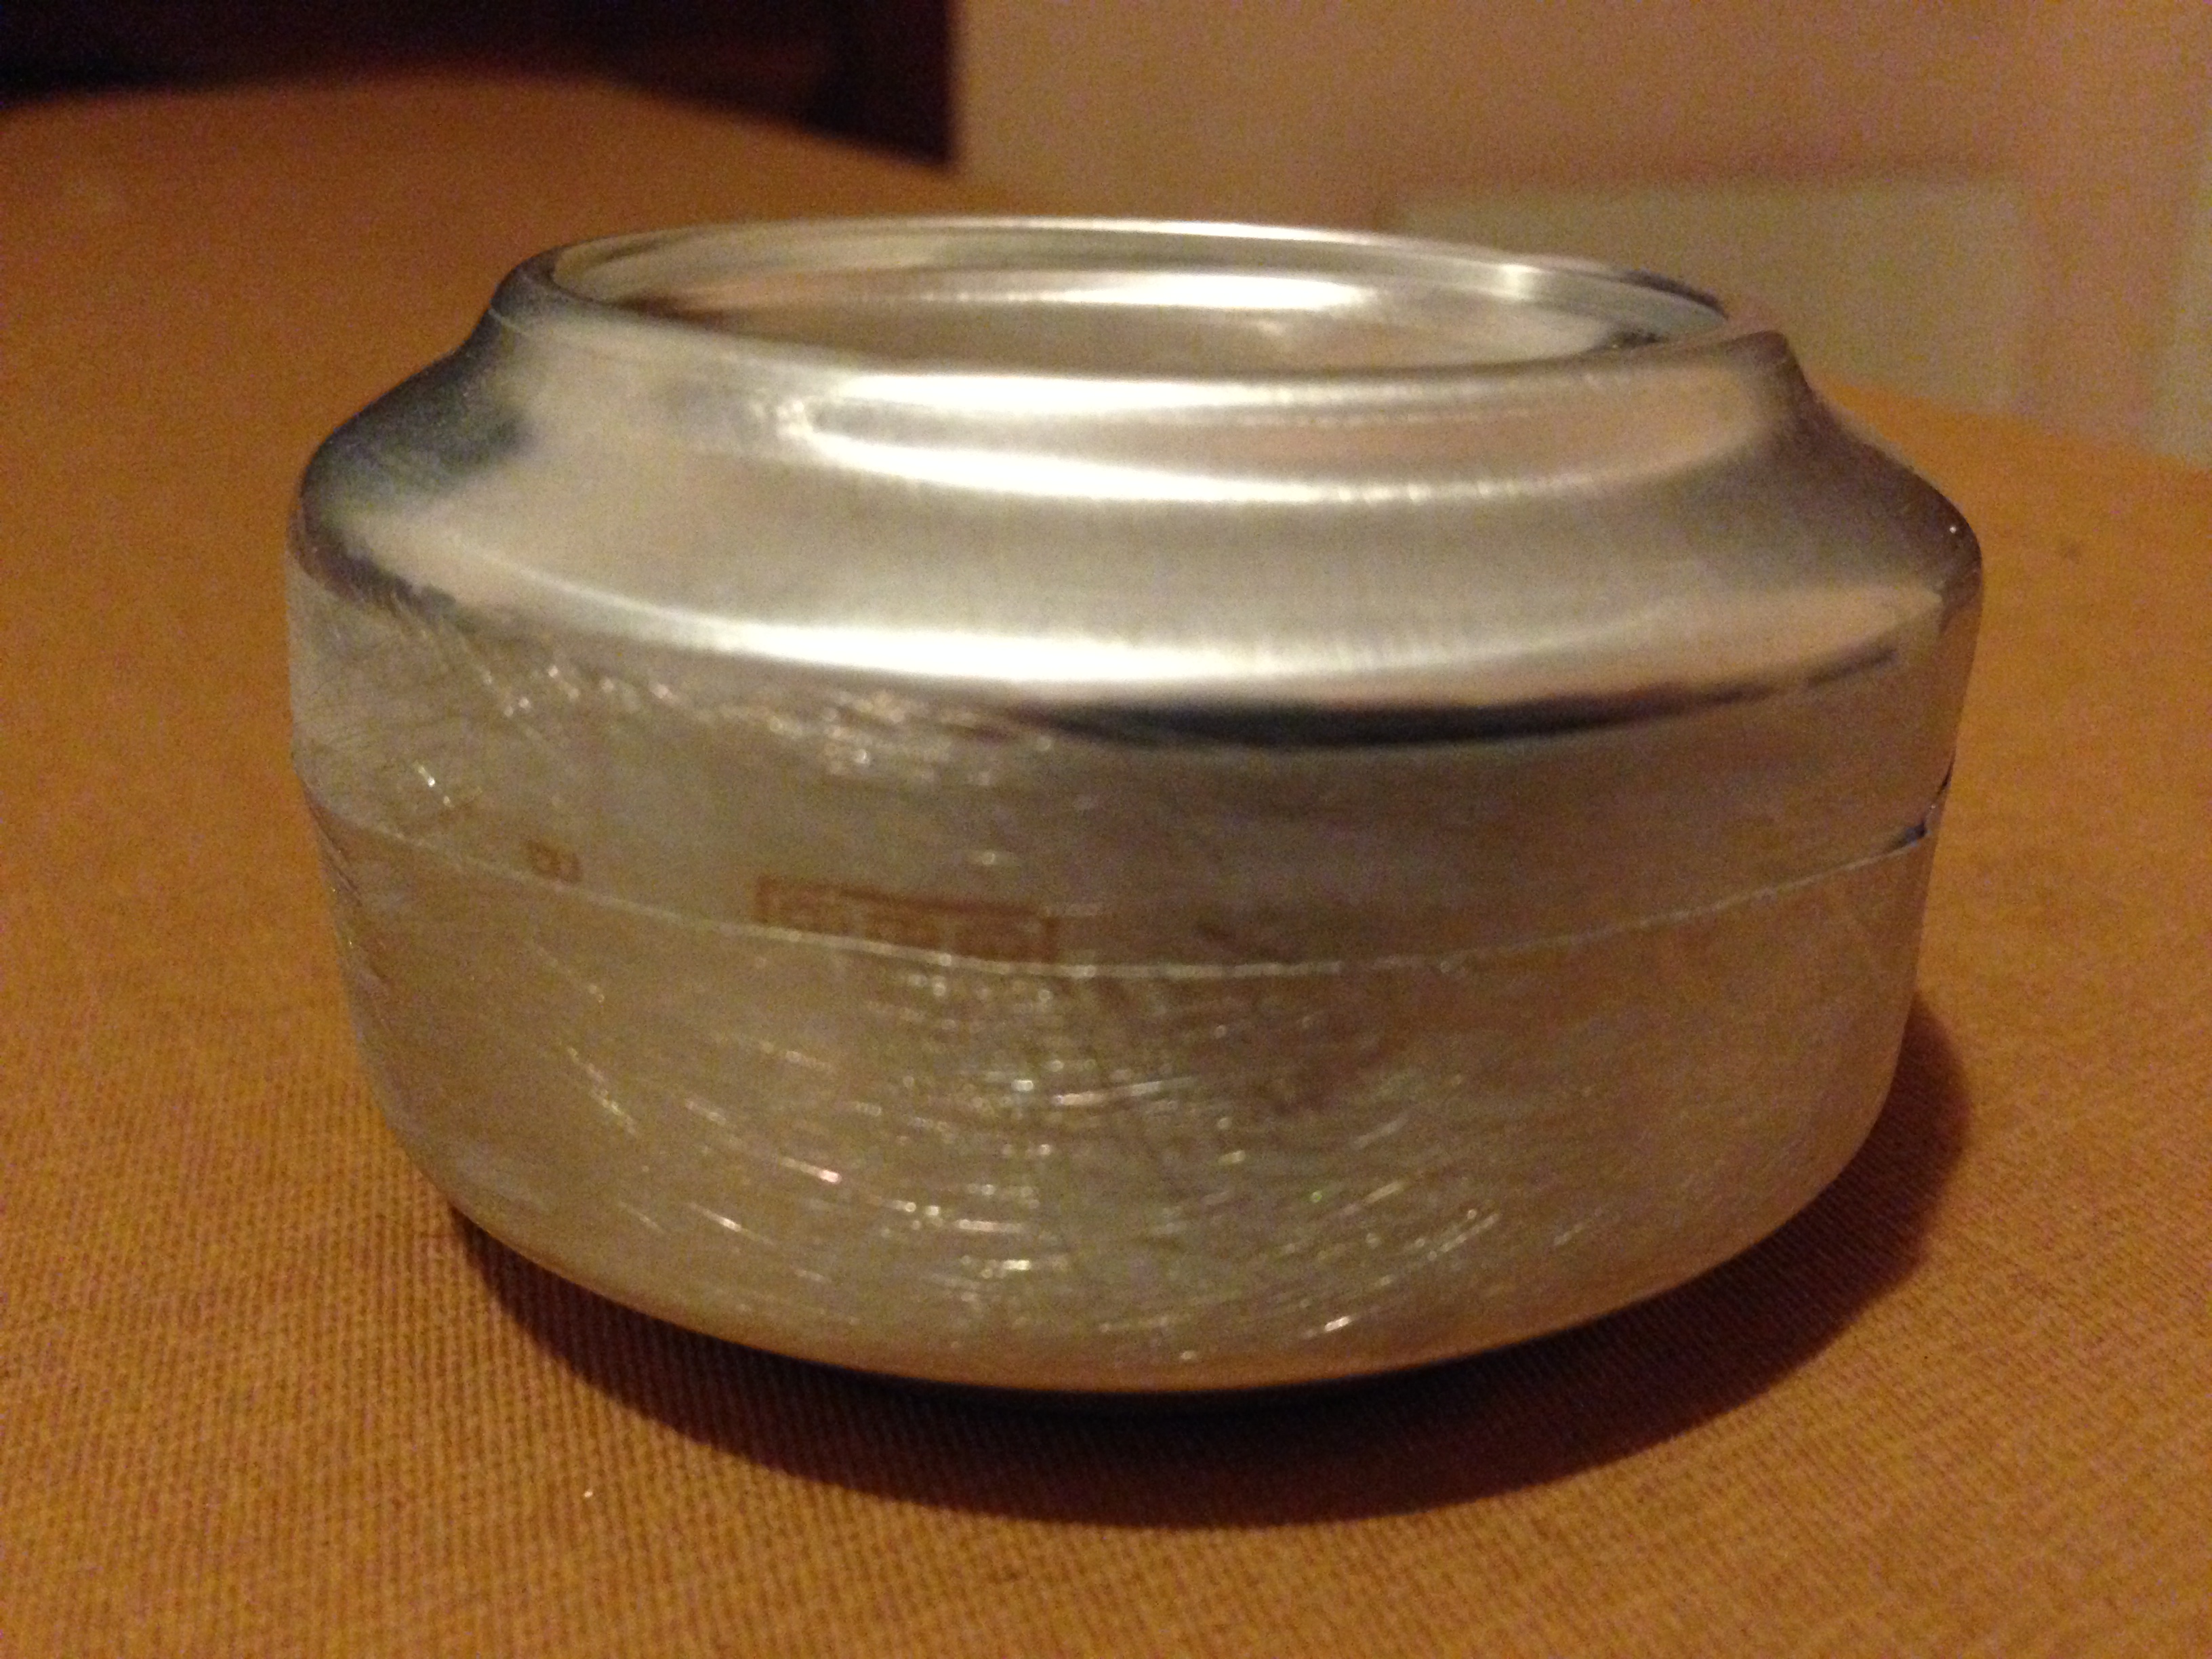
Step 8:
Use a small nail (or push pin, thumb tack, etc.) to puncture holes into the top portion of the stove. You can use a piece of tape to measure the circumference of the stove and make tick marks at constant intervals along the tape to have holes that are equal distances apart from one another. I didn’t do this, just eyeballed the holes and punched away.

And that’s our final product!
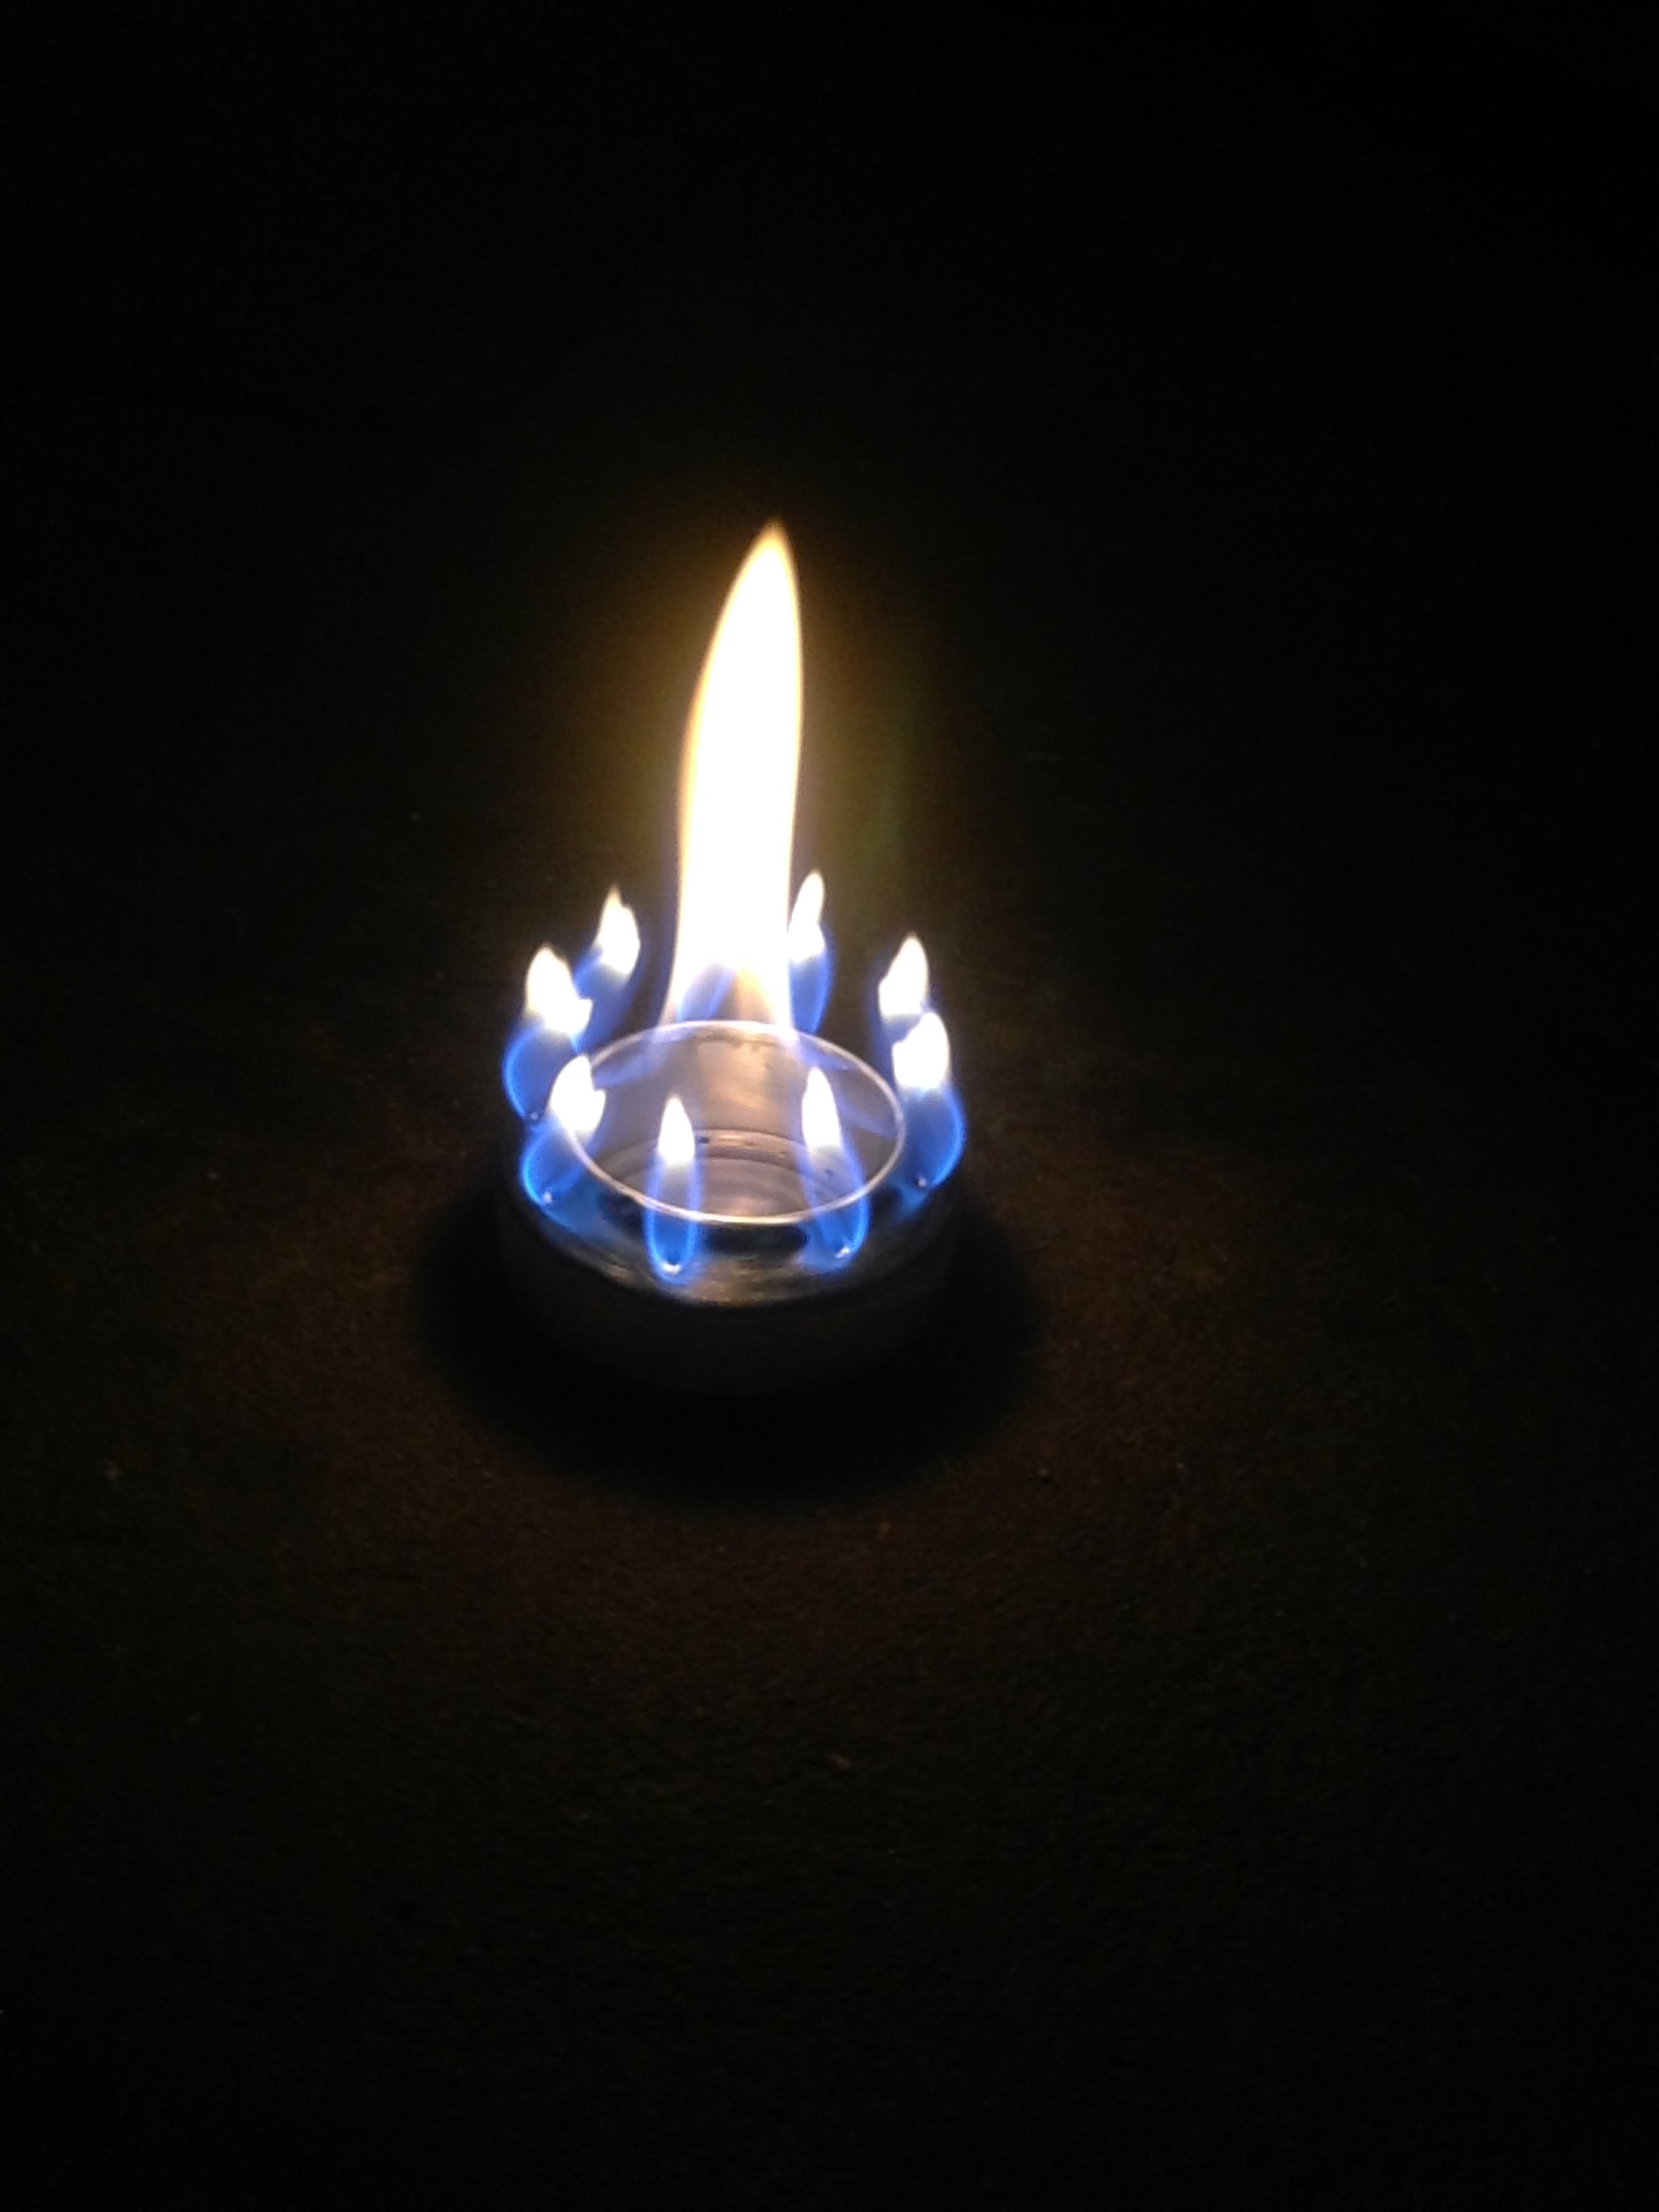
Now pour about a half-inch of denatured alcohol, light the fuel with a lighter or match, and there ya go… a fully functional stove.
Tips:
Use a pot-stand to make sure you don’t snuff the flame with your pot. We made our original one out of an aluminum grill screen, but it started to melt (whoops). Our next pot stand will be made out of good ole chicken wire.

That is awesome! Never be without a cup of tea again!